Avoiding Paint Defects on Diecast Models: A 2026 Guide
Table of Contents
- Why Diecast Paint Fails: Understanding the Root Causes
- Diecast Storage Best Practices to Prevent Paint Defects
- Choosing the Best Wax for Diecast Cars
- Repairing Paint Chips on Diecast Models: A Step-by-Step Approach
- Material-Specific Risks: Why Some Models Are More Vulnerable
- Building a Preventative Maintenance Schedule
- Conclusion: Protecting Your Collection's Finish for the Long Term
- Frequently Asked Questions
Last Updated: September 8, 2026
Paint defects are the single most common reason a prized diecast model loses its showroom appeal. Whether it is paint rash, a dull haze from UV degradation, or a chip from an accidental knock, these blemishes frustrate collectors. This guide helps you master the techniques for avoiding paint defects on diecast models, covering environmental causes, storage habits, and repair methods so your collection retains its value.
Why Diecast Paint Fails: Understanding the Root Causes
Diecast paint failure is rarely a single event; it is usually the result of cumulative environmental stress. The two primary culprits are oxidation and moisture ingress, which attack the interface between the metal body and the paint layers. When moisture becomes trapped, it can trigger a chemical reaction on the zinc alloy base, leading to a condition often called zinc pest, characterized by paint bubbling and structural expansion.
Many collectors assume a paint defect means the model was defective at purchase. In practice, finish integrity depends on the storage environment and handling over time. High humidity, temperature swings, and airborne solvents all accelerate the breakdown of the clear coat and base layers.
Diecast Storage Best Practices to Prevent Paint Defects
The most effective strategy for avoiding paint defects on diecast models is proactive environmental control. You cannot reverse oxidation, but you can absolutely prevent it from starting. The goal is to create a stable microclimate that mimics a temperature-controlled warehouse, not a garage or a sunny windowsill.
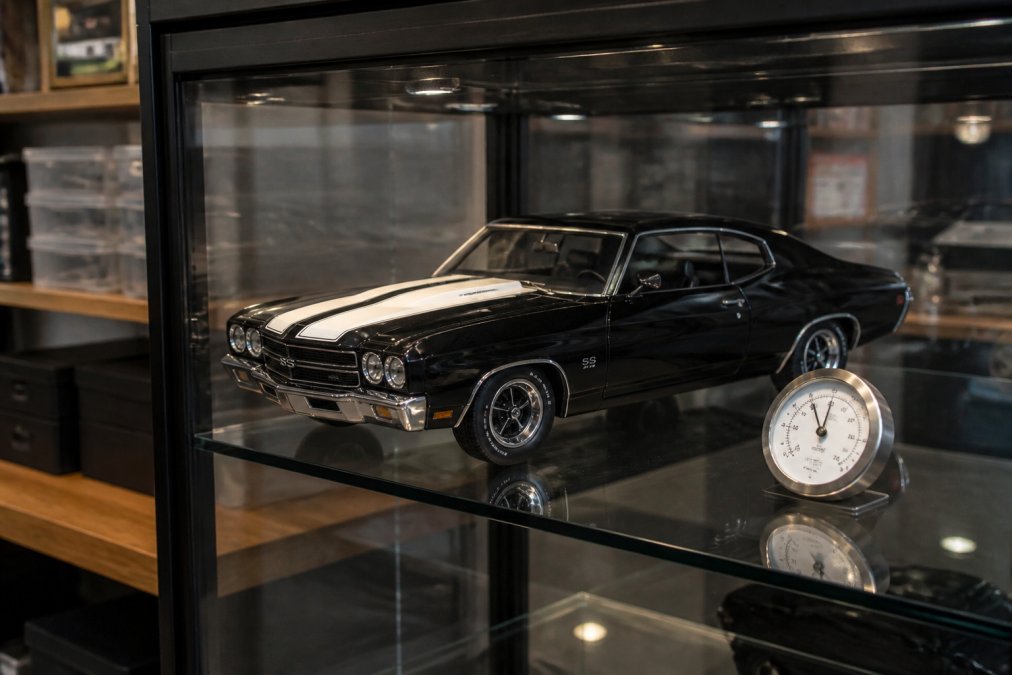
Avoid displaying models in direct sunlight, which accelerates UV degradation and fades the finish. Prioritize a location away from windows and HVAC vents. For boxed models, keep them upright to prevent tires from pressing against the bodywork and causing permanent indentations.
Controlling Humidity and Temperature
Humidity control is the most critical factor in preventing paint defects. Fluctuating humidity causes the metal to expand and contract at a different rate than the paint, leading to micro-cracks where moisture can enter. Ideally, you should maintain a stable relative humidity level between 40% and 50%.
In high-humidity regions, silica gel packets inside display cases are a low-cost measure; for larger collections, a room dehumidifier is worthwhile. Temperature stability matters equally, avoid attics or basements with extreme seasonal swings, as rapid changes cause condensation, the enemy of paint adhesion.
Shielding Models from UV Light and Chemical Exposure
Beyond humidity, you must shield models from ultraviolet light and chemical contaminants. UV light is notorious for causing yellowing and chalking of clear coats, while chemical exposure can be more insidious. Many collectors do not realize that off-gassing from certain materials can damage paint.
Displaying models on certain painted wooden shelves or cheap foam padding can lead to chemical reactions. Solvents in cleaning products, or fumes from nearby paint thinner, can fog a clear coat permanently. Use display cases with UV-protective glass and ensure padding or risers are archival-grade and non-reactive.
Choosing the Best Wax for Diecast Cars
Selecting the right protectant means matching the product chemistry to the model's paint type and display environment. The top results distinguish between three categories: pure carnauba waxes, synthetic sealants, and spray detailers, each with a specific role in a maintenance routine.
Carnauba Waxes: Depth and Warmth
Pure carnauba waxes, such as P21S Carnauba Wax or Chemical Guys Butter Wet Wax, impart a deep, warm gloss ideal for solvent-based enamel paints. The trade-off is durability: carnauba breaks down under UV and heat, lasting 4 to 6 weeks on a displayed model, requiring reapplication every other month.
Synthetic Sealants: Durability and Clarity
Synthetic sealants, like Meguiar's Ultimate Liquid Wax or Turtle Wax Hybrid Solutions Ceramic Spray Coating, bond with the clear coat and offer longer protection, often 4 to 6 months, with more resistance to moisture and off-gassing. They produce a sharp, glassy clarity rather than carnauba's warm depth, often the more authentic look for factory clear coats.
Spray Detailers: Maintenance Between Waxes
A spray detailer, such as Griot's Garage Speed Shine, is not a substitute for wax or sealant; it safely removes dust and fingerprints between applications without stripping the protectant. Use a "quick detailer" or "spray wax," not a "cleaner wax" with abrasives, which will dull the finish over repeated use.
Application Mechanics That Matter
Application method matters as much as the product. Apply a thin, even coat with a foam applicator pad, let it haze for 5 to 10 minutes, then buff with a plush microfiber towel. Use a cotton swab to remove residue from crevices before it cures. Never use a rotary polisher; the heat can soften paint and cause visible micro-swirls.
The Role of Paint Type in Wax Choice
Your model's paint chemistry should dictate your wax choice. For older single-stage lacquer paints, which are porous and prone to chalking, pure carnauba is safer because it lacks the solvents in some synthetic sealants that can soften aged lacquer. For modern two-part urethane clear coats, synthetic sealants are safe and superior. If unsure, test on the underside of the chassis and wait 24 hours.
Repairing Paint Chips on Diecast Models: A Step-by-Step Approach
Even with perfect storage, accidents happen. The goal of repairing paint chips on diecast models is to make the damage invisible while protecting bare metal from oxidation. The approach differs significantly depending on whether you are working with a zinc alloy body or a resin model, a distinction most guides fail to make.
Understanding the Substrate: Metal vs. Resin
Diecast metal bodies, typically zinc-aluminum alloy, require a primer that bonds to bare metal and prevents corrosion. Resin bodies, common in high-end limited editions, are non-reactive but require different preparation because paint adheres mechanically, not chemically. On resin, a chip exposes a smooth surface needing aggressive scuffing; on metal, the porous surface will oxidize quickly if unprotected.
Surface Preparation and Touch-Up Methods
Surface prep determines the final result. Here is the step-by-step approach, with material-specific notes:
- Clean the area: Use a mild degreaser or isopropyl alcohol on a cotton swab to remove all oils and dust from the chip and the surrounding area. For resin models, follow with a tack cloth to remove any static-charged dust.
- Scuff the edges: Use a fine abrasive, like a 3000-grit polishing compound pad, to feather the edges of the chip. This removes the sharp lip of the clear coat and gives the new paint a surface to grip. On resin, use a slightly coarser 2000-grit pad to ensure the paint has enough tooth to hold.
- Apply primer: Use a toothpick or a fine brush to apply a tiny amount of metal primer to the exposed bare metal. For metal bodies, use an etching primer like Dupli-Color Self-Etching Primer, which contains acid to bite into the zinc surface. For resin, use a standard plastic primer like Tamiya Fine Surface Primer, which is formulated to adhere to smooth surfaces without chemical etching.
- Layer the paint: Apply the color-matched paint in thin, multiple layers. Allow each layer to dry completely before the next. The drying time is critical: solvent-based enamels need 24 hours between coats, while water-based acrylics can be recoated after 2 hours. It is better to build up the paint level than to apply one thick drop, which will shrink as it cures, leaving a depression.
- Level and polish: Once the paint is fully cured, at least 72 hours for most paints, carefully wet-sand the area with a high-grit abrasive (6000-grit or finer) to level it with the surrounding paint, then finish with a polishing compound to restore the gloss. For resin models, be extra cautious with wet-sanding; resin is softer than metal and you can easily sand through the surrounding paint if you apply too much pressure.
- Seal with clear coat: Apply a thin layer of clear coat to protect the repair and blend it with the existing finish. For metal models, use a clear coat with UV inhibitors to prevent future yellowing. For resin, use a clear coat matched to the original paint system to avoid solvent incompatibility.
Color Matching: The Practical Reality
For precise color matching, check the model's documentation for the paint code. If unavailable, take a high-resolution photo in natural light and use a color-matching service at an automotive paint supplier. Serious collectors often keep touch-up paints for common factory colors, like GM's Torch Red, Ford's Race Red, or Mopar's Sublime Green, since these appear across multiple releases.
When Repair Is Not the Right Choice
Knowing when not to repair separates experienced restorers from novices. If the chip is on a prominent curved surface, such as a fender edge or door crease, a hand-painted repair often looks worse than the chip; leave it as honest wear or commission a full repaint. If paint is bubbling due to zinc pest, no surface repair will stop the chemical reaction, filling it only delays the inevitable and complicates future restoration.
Material-Specific Risks: Why Some Models Are More Vulnerable
Not all diecast models are created equal. The alloy composition and paint type significantly influence vulnerability to defects. Models with lower-grade zinc alloys are more prone to zinc pest, where internal oxidation swells the metal and cracks the paint from within, a reaction nearly impossible to stop once started.
Paint chemistry matters: enamel paints resist solvents but chip easily due to hardness, while lacquer offers high gloss but is more UV-sensitive. Understanding your models' base materials helps tailor storage, for older models prone to zinc pest, be extra vigilant about humidity, as moisture accelerates the reaction.
Building a Preventative Maintenance Schedule
Prevention requires a routine. A preventative maintenance schedule ensures small issues are caught before they become permanent defects, and a quarterly review can save you from costly restoration.
Here is a practical schedule to follow:
- Monthly: Dust the display cases and models using a soft, anti-static brush. Avoid compressed air if it is not filtered, as it can propel moisture or oil onto the paint.
- Quarterly: Inspect models under a bright light for early signs of paint bubbling or haze. Check the integrity of the display case seals and replace silica gel packets if they have changed color.
- Bi-annually: Apply a fresh coat of wax to models that are handled frequently or displayed in open areas. This maintains the protective barrier against environmental factors.
| Maintenance Task | Frequency | Key Tools | Impact on Finish |
|---|---|---|---|
| Dusting | Monthly | Anti-static brush | Prevents micro-scratches |
| Full Inspection | Quarterly | Bright LED light | Detects early paint bubbling |
| Wax Application | Bi-annually | Microfiber cloth, wax | Maintains moisture barrier |
| Environment Check | Quarterly | Hygrometer | Ensures proper humidity control |
Conclusion: Protecting Your Collection's Finish for the Long Term
Protecting your collection from paint defects is a matter of understanding material science and applying consistent, preventative care, controlling the storage environment, understanding model vulnerabilities, and acting quickly with proper repair techniques.
We build our 1:18 scale American muscle cars and display dioramas as investments meant to be showcased. By following these protocols, you protect that investment. Explore our current collection to find your next centerpiece, knowing it is crafted to withstand the test of time. Get started with YCID Diecast and Dioramas today.
Frequently Asked Questions
What causes paint rash on diecast models?
Paint rash, also called zinc pest, typically results from a chemical reaction within the zinc alloy base metal. This reaction creates oxides that push outward from beneath the paint layer, causing visible bubbling and chipping. Environmental factors like high humidity, temperature swings, and exposure to airborne chemicals can accelerate this process. While you cannot reverse the underlying metal reaction, proper storage and climate control slow its progression significantly.
Can paint rash on diecast cars be reversed?
Once paint rash has started, the physical damage to the paint layer cannot be reversed. The corrosion process has already compromised the paint adhesion and the metal surface beneath. Your options are to stabilize the model by storing it in a controlled, low-humidity environment or to undertake a full restoration, which requires stripping the original paint, treating the metal, and applying a new primer and paint finish.
Does humidity affect diecast model paint?
Yes, high humidity is a primary trigger for paint defects. Moisture in the air can penetrate microscopic gaps in the paint and reach the zinc alloy base. This accelerates oxidation and leads to paint bubbling and chipping over time. Maintaining a stable relative humidity between 40% and 50% in your storage area is the most effective way to slow this chemical process and preserve the finish integrity of your collection.
What is the best way to clean diecast models without damaging the finish?
Use a soft, anti-static microfiber cloth for routine dusting. For more thorough cleaning, use a mild solution of distilled water and a drop of pH-neutral dish soap. Dampen the cloth, not the model, and wipe gently. Avoid household cleaners containing ammonia or solvents, as these can degrade the clear coat and paint over time. After cleaning, allow the model to air dry completely before returning it to its display case.