How to Clean Diecast Car Models: A 2026 Guide
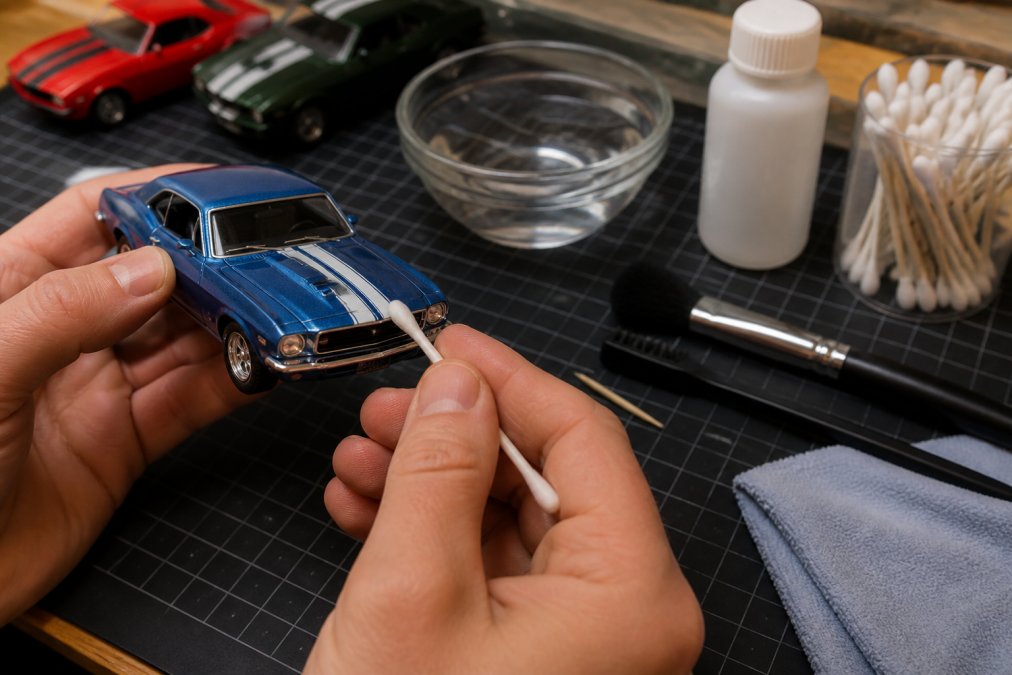
Table of Contents
- What You'll Need Before You Start Cleaning Diecast Models
- Best Tools for Cleaning Diecast Models
- How to Remove Dust from Diecast Cars: Step-by-Step
- Can You Use Compressed Air on Diecast Models?
- How to Clean Diecast Car Models: The Full Wash Method
- Polishing, Waxing, and Applying a Protective Coating
- Scale-Specific Nuances: 1:18, 1:24, and 1:64 Models
- Repairing Cleaning Damage and Storage After Cleaning
- Frequently Asked Questions
Last Updated: September 1, 2026
Knowing how to clean diecast car models separates a serious collector from someone who just buys and shelves. Get it wrong and you can strip paintwork, lift decals, or introduce corrosion that compounds over time. This guide covers everything from tools to scale-specific nuances, so your collection stays display-ready for years.
What You'll Need Before You Start Cleaning Diecast Models
Before touching a model, understand what it's made of and what you're cleaning. Most diecast car models are zinc alloy bodies with plastic windows, interiors, and trim. Higher-end pieces incorporate resin for finer details. Each material responds differently to cleaning agents.
Work on a clean, padded surface, a folded microfiber cloth or foam mat protects the model if it tips. Good lighting is essential to see dust in recessed areas clearly.
Chemical Compatibility: What's Safe and What Destroys Paintwork
Collectors often reach for whatever cleaning product is nearby, not realizing that solvents and alcohol-based cleaners strip paintwork and cloud plastic windows within seconds.
Here's a practical compatibility reference:
| Cleaning Agent | Safe for Zinc Alloy | Safe for Paintwork | Safe for Plastic/Resin | Safe for Decals |
|---|---|---|---|---|
| Distilled water | Yes | Yes | Yes | Yes |
| Mild soap (dish soap, diluted) | Yes | Yes | Yes | Use caution |
| Isopropyl alcohol | Yes | No | No | No |
| Acetone / nail polish remover | No | No | No | No |
| Ammonia-based cleaners | No | No | No | No |
| WD-40 / petroleum solvents | No | No | No | No |
Distilled water and a drop of mild soap cover almost every cleaning situation. Distilled water matters because tap water contains minerals that leave water spots and accelerate oxidation on exposed metal.
Best Tools for Cleaning Diecast Models
The best tools are inexpensive, widely available, and designed for gentle contact with delicate surfaces. You don't need specialized products marketed for scale models.
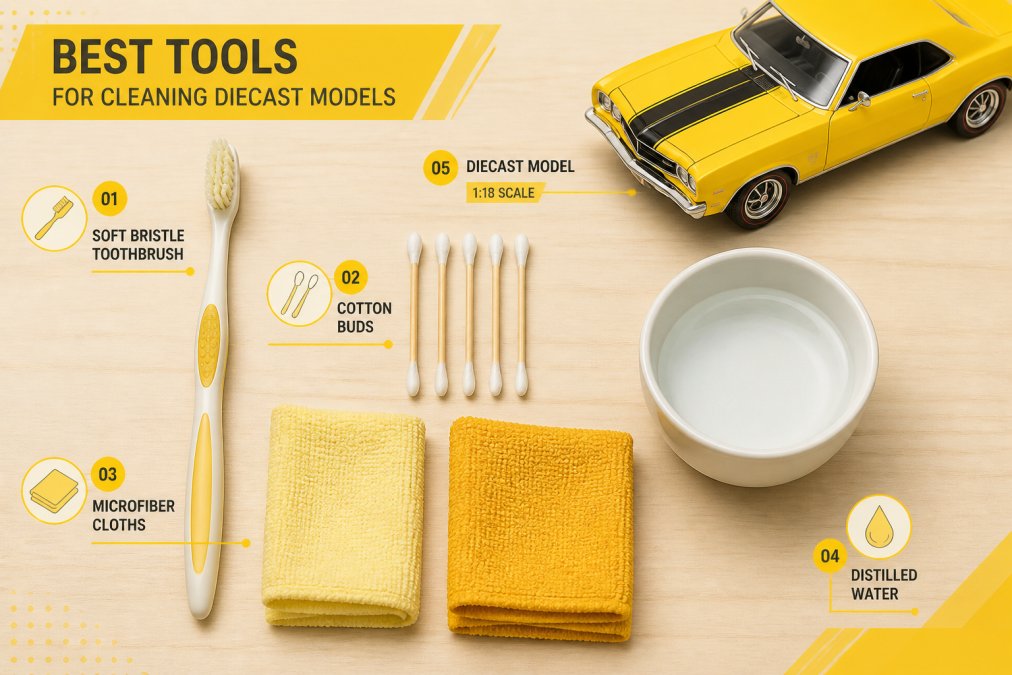
Keep these in your cleaning kit:
- Microfiber cloths: Lint-free and non-abrasive. Use separate cloths for washing and drying.
- Soft bristle toothbrush: Best for wheel wells, engine bay details, and grille openings without scratching.
- Cotton buds: Precise application in tight gaps around door seams, headlights, and interior trim.
- Small bowl or tray: For mixing distilled water and mild soap.
- Distilled water: Available at most grocery stores. Tap water is not a substitute.
- Mild dish soap: One drop in a bowl of distilled water is enough.
- Compressed air canister (optional): Useful for initial dust removal. See the dedicated section below before using.
According to Smithsonian Institution's collections care resources, gentle mechanical cleaning with soft brushes and distilled water is the recommended approach for preserving painted metal objects, which applies directly to diecast models.
How to Remove Dust from Diecast Cars: Step-by-Step
Dust removal is the most frequent maintenance task, and it's where most surface scratches originate. Dry wiping drags abrasive particles across paintwork, creating fine scratches that dull the surface finish.
Follow this sequence instead:
- Move the model to a clean workspace away from other pieces.
- Blow off loose dust with a compressed air canister held at least 15 cm away, or use a soft natural-hair brush to sweep dust gently. Never use a dry cloth at this stage.
- Dampen a microfiber cloth with distilled water. It should be barely moist, not wet.
- Wipe in one direction across flat body panels. Avoid circular motions, which spread grime and introduce scratches.
- Use cotton buds for door seams, mirror bases, and areas the microfiber cloth can't reach.
- Let the model air dry on a clean surface before returning it to display.
Reaching Engine Bays, Wheel Wells, and Tight Gaps
Engine bays and wheel wells accumulate the worst grime on 1:18 scale models. Use a soft bristle toothbrush with short, controlled strokes rather than scrubbing motions.
For wheel wells on 1:64 scale models, a toothbrush is often too large. Use a cotton bud dampened with distilled water and work carefully around the wheel arch.
Can You Use Compressed Air on Diecast Models?
Compressed air is safe when used correctly, but carries two real risks.
Risk 1: Propellant discharge. Compressed air canisters can release liquid propellant if tilted or shaken. That propellant is a solvent and damages paintwork and decals. Always hold the canister upright and use short bursts.
Risk 2: Dislodging fragile parts. On detailed 1:18 scale models, compressed air at close range can detach mirrors, antennas, or engine bay details. Keep the nozzle at least 15-20 cm away and use the lowest effective pressure.
For routine dust removal, a soft brush is lower-risk than compressed air. Reserve compressed air for areas a brush cannot reach.
How to Clean Diecast Car Models: The Full Wash Method
The full wash method is appropriate for models with visible grime, not just surface dust.
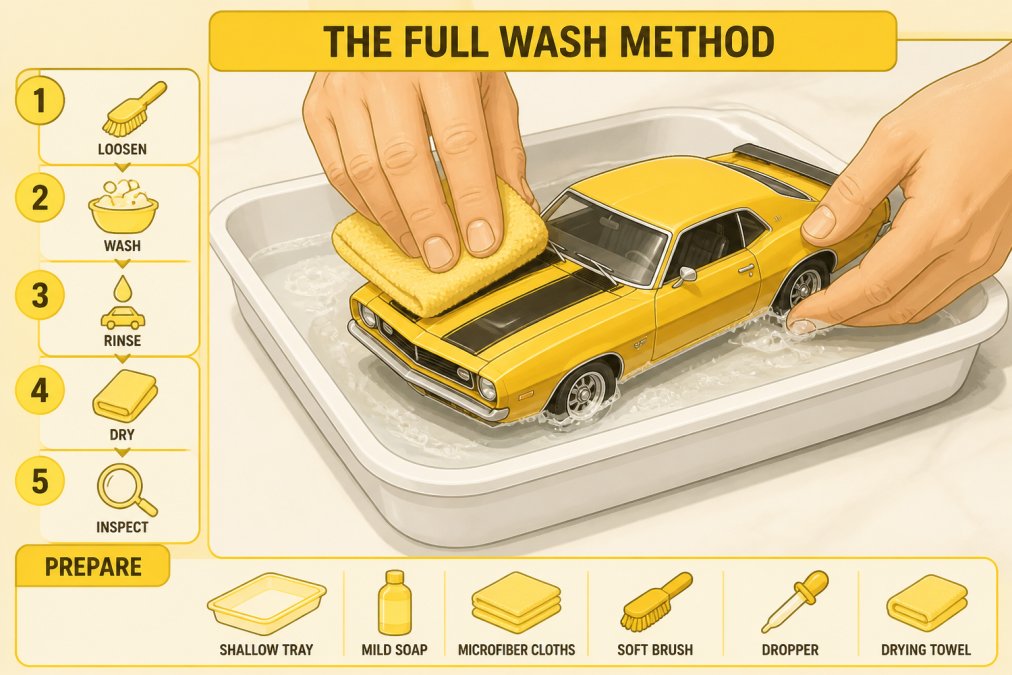
Before submerging: Check whether the model has paper-based decals, loose chrome trim, or rubber tires that could be damaged by prolonged water contact. Many 1:18 and 1:24 scale models have water-slide decals that can lift if soaked.
The wash process:
- Fill a shallow tray with lukewarm distilled water and add one drop of mild dish soap.
- Submerge the model briefly, or use a dampened microfiber cloth to wash section by section.
- Use a soft bristle toothbrush on wheels, wheel wells, and the undercarriage.
- Rinse by wiping with a clean cloth dampened in plain distilled water. Do not rinse under running tap water.
- Move immediately to drying.
Handling Decals and Delicate Parts During Washing
Decals are the most vulnerable part during washing. Water-slide decals and printed markings can be compromised by prolonged moisture or rubbing contact.
Work around decals rather than across them. When cleaning near a decal, use a cotton bud dampened with distilled water and apply minimum pressure. Never rub a decal directly. If a decal edge has begun to lift, do not wash that area: address the decal adhesion first.
For chrome trim and polished metal details, use the same gentle approach. Chrome is durable but develops fine scratches from abrasive contact, which shows clearly under display lighting.
Drying Techniques to Prevent Water Spots
Water spots form when minerals evaporate and leave deposits on the surface finish. Using distilled water reduces this risk, but drying technique matters.
Pat the model dry immediately with a clean, lint-free microfiber cloth. Do not let it air dry while wet: even distilled water leaves faint marks if left to evaporate on painted surfaces. Work across body panels first, then wheels and undercarriage. Use a dry cotton bud to wick moisture from door seams and tight gaps.
Polishing, Waxing, and Applying a Protective Coating
Polishing and waxing go beyond cleaning into active preservation. For most collectors, they're worth doing once or twice a year on display pieces.
Polishing addresses light surface oxidation and minor dullness. Use a plastic-safe polish applied with a microfiber cloth in straight, overlapping strokes. Work one panel at a time and remove polish residue before it dries.
Waxing applies a protective coating that slows dust adhesion and protects against humidity-related oxidation. Carnauba-based waxes are gentle and don't contain abrasive compounds. Apply a thin layer with a clean microfiber cloth, allow it to haze, then buff off with a separate lint-free cloth.
According to conservation resources from the American Alliance of Museums, protective coatings that reduce surface contact with airborne contaminants are standard preservation strategy for painted collectibles.
A thin wax coat every six to twelve months is reasonable for actively displayed models. Models in enclosed display cases need less frequent treatment.
Scale-Specific Nuances: 1:18, 1:24, and 1:64 Models
Scale affects cleaning approach more than most collectors realize. Physical size differences change which tools are practical and how much risk each step carries.
1:18 scale models are large enough to handle most cleaning tools comfortably. Engine bays are accessible with a toothbrush, door seams with standard cotton buds, and surface area is large enough for effective microfiber cloth use. These models have complex details including opening hoods and doors, creating more grime accumulation areas. YCID Diecast and Dioramas specializes in 1:18 scale American muscle cars, and at this scale, detailing demands careful attention to every recess.
1:24 scale models sit between the extremes. Most 1:18 tools work here with more care around smaller details. Wheel wells are tighter and interior detailing requires cotton buds rather than toothbrushes.
1:64 scale models present genuine challenges. A standard cotton bud is almost too large for precise work. Use the cotton bud tip or a fine artist's brush for detail work. The wash method is lower-risk at 1:64 scale because there are fewer opening parts, but decals are proportionally smaller and more fragile.
According to guidance from the Scale Auto Enthusiasts hobby community, smaller scale models generally benefit from dry cleaning methods over wet washing because the risk-to-benefit ratio shifts as model size decreases.
Repairing Cleaning Damage and Storage After Cleaning
Cleaning damage happens even to experienced collectors. Common issues are paint lifting from solvent contact, decal bubbling from excess moisture, and fine scratches from abrasive contact.
Paint lifting: If paint lifts due to chemical contact, stop cleaning and let the model dry completely. Minor lifting can sometimes be stabilized with a small amount of clear model lacquer applied with a fine brush.
Decal bubbling or lifting: A lifted decal edge can often be re-adhered with a very small amount of decal softener or diluted PVA adhesive applied under the edge with a pin. Press gently with a cotton bud and allow to dry flat.
Fine scratches: Light scratches can often be reduced with plastic-safe polish and careful buffing. Deep scratches that reach the base coat are difficult to address without repainting.
Storage after cleaning: Once clean, how you store the model determines how long it stays that way. Enclosed display cases dramatically reduce dust accumulation and protect against humidity-related oxidation and corrosion. UV-filtering glass or acrylic is worth considering for models near windows, as UV exposure fades paintwork.
For models in storage, individual soft cloth bags or acid-free tissue wrapping prevents surface contact between pieces and protects paintwork from scratching during handling.
The National Park Service preservation briefs on metal object care identify humidity control and enclosed storage as the most effective long-term preservation strategies for painted metal collectibles, a principle that applies directly to diecast models.
Keeping a diecast collection in display condition requires consistent, low-intervention care: the right cleaning frequency, the right tools, and understanding what each material tolerates. At YCID Diecast and Dioramas, our 1:18 scale American muscle cars and precision display dioramas are built to be shown, which means they're built to be maintained. If you're looking for models worth the effort of proper care, browse our current releases and take advantage of free US shipping on in-stock orders over $300.
Frequently Asked Questions
Q: What cleaning agents are safe for diecast paintwork?
A: Mild dish soap diluted in distilled water is the safest option for cleaning diecast paintwork. Avoid anything containing alcohol, acetone, or petroleum-based solvents, these strip protective coatings and dissolve decals on zinc alloy and resin models. For stubborn grime, a small amount of isopropyl alcohol (70% or lower) applied with a cotton bud to a non-painted metal surface is acceptable, but keep it well away from painted areas and decals.
Q: Can you use compressed air on diecast models?
A: Yes, but with strict precautions. Hold the can upright, keep the nozzle at least 6 inches from the model, and use short bursts at low pressure. Compressed air released too close or at high pressure can dislodge delicate decals, crack fragile resin parts, and even chip paintwork on 1:64 scale models. A hand-squeeze air blower, the type used for camera lenses, is a safer alternative for routine dust accumulation between deep cleans.
Q: How do you clean diecast models without damaging decals?
A: Never soak a model with decals for extended periods. Use a barely damp microfiber cloth and work gently around decal edges rather than across them. Avoid rubbing motions, dab instead. Skip any solvent-based cleaner entirely near decals. On 1:18 scale models where decals are larger and more robust, a soft bristle toothbrush with diluted mild soap works well if you brush parallel to the decal edge, not against it.
Q: How often should you clean your diecast collection?
A: Dust your diecast models every two to four weeks if they are displayed in open air. Models kept in display cases with good seals need a full clean only two or three times per year. The frequency depends on your environment, homes with pets, forced-air heating, or high foot traffic accumulate dust faster. A quick pass with a lint-free microfiber cloth between deep cleans prevents grime from bonding to the surface finish and reduces the need for wet cleaning.
This article was written using GrandRanker