Tips for Building Realistic Model Dioramas
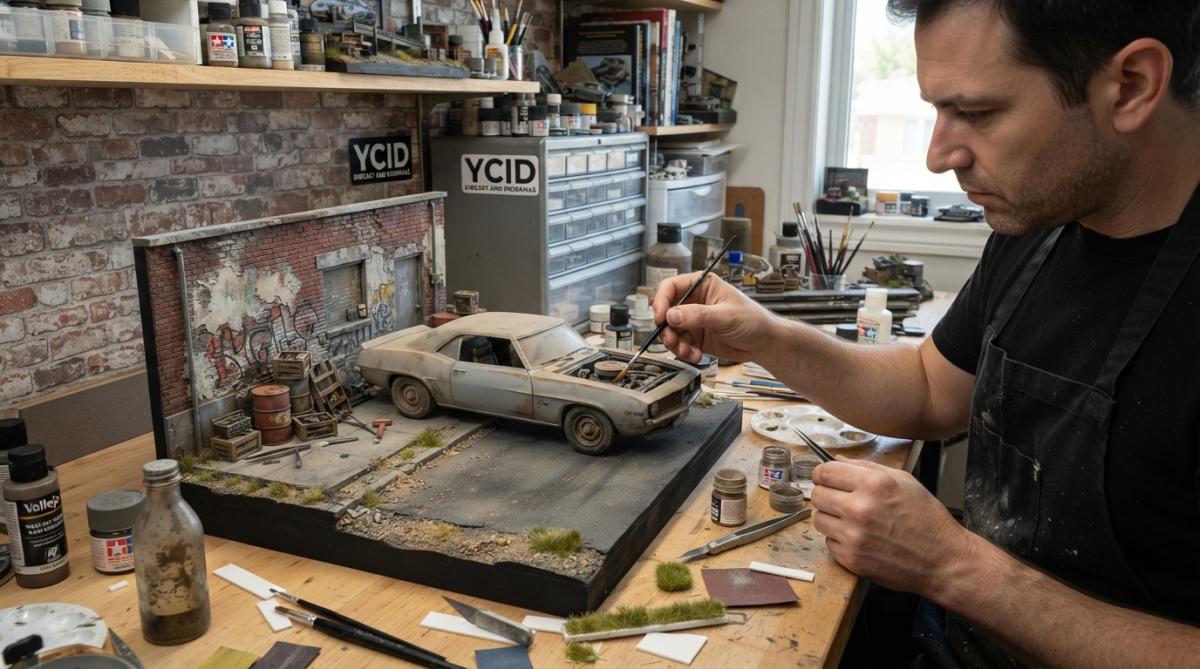
Table of Contents
- Planning and Sketching Your Diorama Scene
- Essential Tools for Building Model Dioramas
- Building the Base and Foundation
- Creating Realistic Terrain and Textures
- How to Weather Diecast Cars for Dioramas
- Painting Techniques, Shadows, and Visual Depth
- Lighting Integration and Best Display Cases for 1:18 Cars
- Photography and Displaying Your Finished Diorama
- Frequently Asked Questions
Last Updated: September 23, 2026
Planning and Sketching Your Diorama Scene
Plan your diorama before building. Sketch where your cars will sit, where terrain rises and falls, and how light will hit the display.
A 1:18 scale car is roughly 10 inches long. Leave breathing room around your main subject to show off detail without cramping the scene.

Decide on your backdrop: paint a skyline directly on the base, use a printed image, or frame the scene with trees or buildings.
Essential Tools for Building Model Dioramas
Start with basic tools and add as your skills grow. Many can be replaced with household alternatives.
Core tools you'll need:
- Exacto knife or hobby blade for cutting foam board and materials
- Hot glue gun for fast, strong assembly
- Ruler and pencil for marking measurements
- Sandpaper (120-grit and 220-grit) for smoothing edges
- Small paintbrushes for detail work and dry brushing
- Cutting mat to protect your work surface
- Spray adhesive for mounting printed backdrops
Optional but helpful additions:
- Hobby saw for thicker materials
- Paint palette or mixing tray
- Water container for rinsing brushes
- Tweezers for placing small details
- LED work light for better visibility
Budget-friendly material sourcing (trash-bashing):
"Trash-bashing", using household waste for textures, produces authentic results.
- Crumpled newspaper and cardboard: Layer under joint compound for terrain elevation or use tubes as fence posts and tree trunks.
- Coffee filters and paper towels: Layer with diluted glue for weathered fabric and tarps.
- Plastic packaging: Clear clamshells become windows; opaque lids become siding or roofing.
- Dried leaves, twigs, and bark: Collect from your yard and seal with matte spray.
- Sawdust and wood shavings: Mix with paint for rough ground texture.
- Fabric scraps: Cut into strips for weathered surfaces; denim works especially well.
- Gravel and dirt: Free alternatives to hobby materials; rinse and sort by size.
Treat found materials as raw texture: a plastic bottle cap becomes a barrel, foam packing becomes a building block.
Tool alternatives that save money:
- Cutting mat: Scrap plywood or MDF board protected with painter's tape.
- Paint palette: Old ceramic plates, bottle caps, or ice cube trays.
- Spray adhesive: Glue stick for lightweight materials; hot glue for heavier items.
- Hobby saw: Utility knife for foam; hardware store handsaw ($8-15) for thicker wood.
- Work light: Window light or desk lamp with LED bulb (under $20).
The difference between expensive and basic tools is speed and comfort, not quality.
Building the Base and Foundation
Your base must be sturdy enough to support cars and terrain without warping or sagging.
Use at least half-inch thick foam board for 1:18 scale dioramas. Thinner material flexes too much under weight.
Cut your base using an Exacto knife with multiple shallow passes for cleaner edges.
Seal foam edges with paint or putty to prevent uneven paint absorption and protect from damage.
For bases larger than 24 inches, glue wooden strips underneath to prevent sagging.
Creating Realistic Terrain and Textures
Terrain brings your diorama to life. Build elevation changes with foam board layers or crumpled newspaper covered with joint compound.
Layering creates depth: Start with foam base, add foam pieces at different heights, cover edges with joint compound, sand smooth, then paint base color before adding texture.
Add texture with gravel, sand, or flocking materials using spray adhesive for better hold than hot glue.
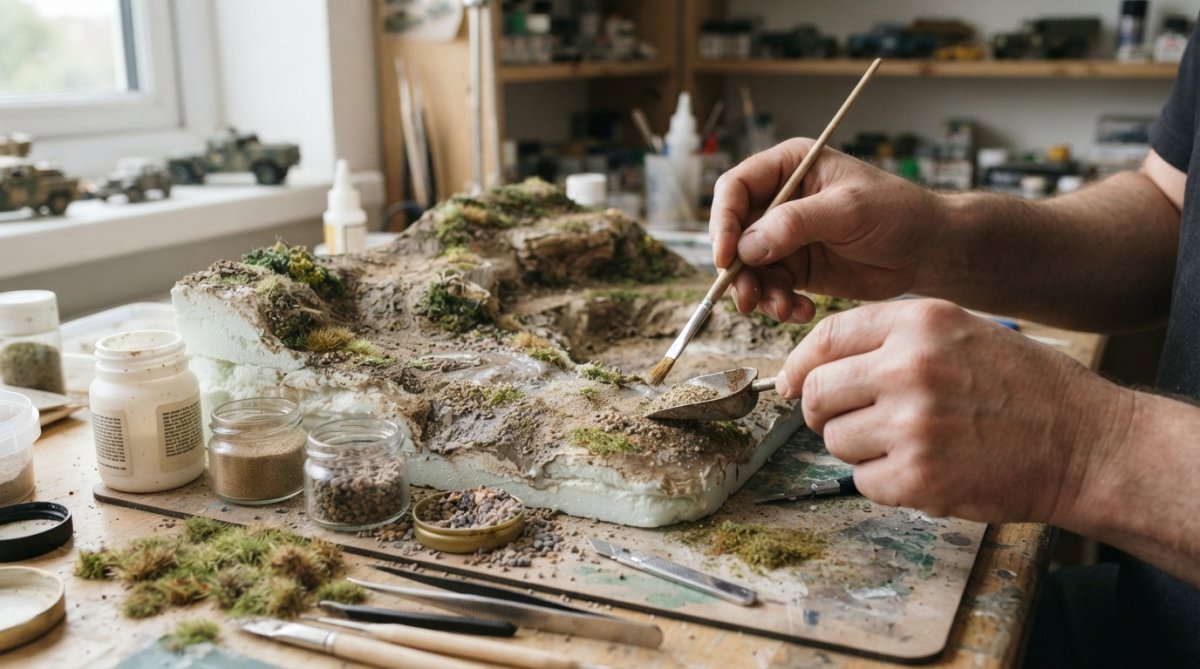
Weathering adds age and realism: Dry brush lighter colors over dark terrain, add darker washes in low spots, scatter different material sizes, and use multiple colors for variety.
Start with a dominant color, then layer secondary colors. Variation beats uniformity.
How to Weather Diecast Cars for Dioramas
Weathering transforms a showroom-fresh diecast into a realistic, lived-in vehicle. This technique is essential for building realistic model dioramas that tell a story.
Apply paint chips with dark brown or black paint on edges, corners, doors, bumpers, and wheel wells where wear shows first.
Apply light gray or tan wash to roof, hood, and trunk, letting it pool in panel lines to mimic dust accumulation.
Apply orange-brown paint thinned with water around chips and panel gaps for rust effect.
Weathering steps: Apply paint chips, add dust wash, apply rust, dry brush lighter colors, add final details like mud splashes.
Dry brush lightly across raised details to highlight edges and create depth.
Painting Techniques, Shadows, and Visual Depth
Make foreground objects darker and detailed, background objects lighter and less detailed to mimic how eyes see distance.
Mr Norms Grand Spaulding Dodge Showroom →
Shadows add dimension: Paint shadows under cars and terrain using dark blue or purple, place consistently from one light source, and blend edges slightly.
Paint light edges on terrain, buildings, and cars using light gray or cream on the side facing your light source.
Make distant backdrop elements lighter and less saturated to create the feeling of distance.
Use warm colors for foreground and cool colors for background to create visual depth.
Lighting Integration and Best Display Cases for 1:18 Cars
Lighting transforms a diorama by highlighting details, creating mood, and making cars shine. It's adjustable after the build is complete.
LED strip lights run cool, don't fade colors, and use minimal power.
Choose warm white (2700K-3000K) for classic scenes, cool white (4000K-5000K) for modern scenes, or daylight white (5000K-6500K) for neutral effect.
Wiring and power: Most LED strips need a 12-volt DC power supply, wire connectors, and optional dimmer switch.
Hide wires along the back or underside using cable clips or painter's tape. Route power cords behind furniture if possible.
Rechargeable LED strips with USB charging work well for portable displays.
Angle lights downward and to the side to minimize glare and highlight cars without washing out details.
For single cars, place light 45 degrees to the side and slightly above. For multi-car scenes, use two light sources at opposite angles.
Hide light sources inside the diorama structure or display case. Mount strips inside the top frame or back wall.
Fiber optic lights create dramatic night scenes by emitting light only at their tips, ideal for streetlights and building windows in 1:18 scale.
RGB LED strips with remote control let you adjust color temperature for different moods or photograph your diorama in various settings.
Layered lighting creates depth. Use bright light on foreground cars and dimmer light on background elements. This mimics atmospheric perspective and makes distant scenery feel farther away. If your display case has adjustable shelves, use separate LED strips on each level with different brightness levels.
Display case considerations:
A good display case protects your diorama from dust and damage while showcasing your work. Key features:
- Glass or acrylic front for dust protection and visibility
- Ventilation holes to prevent heat buildup from lights
- Adjustable shelving for multiple cars
- Removable interior panels for easy access
- Wiring channels or hidden routing for power cords
If building your own display case, use clear acrylic or glass for the front. For a 1:18 scale car, allow at least 15 inches of width, 8 inches of depth, and 6 inches of height inside the case.
Pre-built display cases with integrated lighting limit customization.
Climate control for long-term display:
Photography and Displaying Your Finished Diorama
Your diorama deserves to be seen. Good photography and display elevate your work and let others appreciate the effort you invested.
Photography tips:
- Use natural light when possible, supplemented with your diorama lights
- Shoot from multiple angles to show depth
- Get close-ups of details like weathering and terrain texture
- Avoid harsh shadows by diffusing direct light
- Take photos before and after weathering to show your process
Keep your diorama in a stable environment.
Frequently Asked Questions
What are the best materials for creating realistic ground textures in model dioramas?
Layering is essential for realistic terrain. Start with foam board or carved foam for your base foundation, then apply fine gravel, sand, and flocking in graduated sizes. Acrylic paint seals and adds color variation. Weathering powders applied with dry brushing create dirt and age. Combine materials in stages: larger gravel for depth, medium sand for mid-tones, fine flocking for grass effect. Test material combinations on scrap foam before committing to your diorama.
How do you achieve scale accuracy when building a diorama for 1:18 scale cars?
Scale accuracy depends on consistent proportions throughout. At 1:18 scale, 1 inch equals 18 inches in real life. Measure your diorama space against your model cars before building. Terrain features, buildings, and vegetation must follow the same scale ratio. Use reference photos of real locations to verify proportions. Miniature vegetation and figures designed for 1:18 scale maintain visual harmony. Pre-built dioramas like the Mr Norms Grand Spaulding Dodge Showroom ensure proper scale integration with your collection.
What's the difference between a model and a diorama?
A model is an individual miniature replica, like a 1:18 scale diecast car. A diorama is a complete scene that displays one or more models within an immersive environment, including terrain, buildings, lighting, and scenery. Dioramas add context and visual storytelling around your models. They transform a single car into a showroom display, street scene, or garage setting. YCID offers dioramas in multiple scales designed to showcase your model collection with authenticity and professional presentation.
How do you create realistic lighting effects in a display diorama?
Integrated ceiling lights are the most effective approach. Many YCID dioramas, including the Yenko Chevrolet Dealership and Mr Norms Grand Spaulding models, come with working ceiling lights and on/off switches. LED lights consume minimal power and generate little heat. Position lights to create shadows and highlights that enhance depth and detail. Warm-toned LEDs mimic showroom ambiance, while cool whites suit modern settings. USB-powered options offer flexibility.