Are 1:64 Scale Dioramas Good Quality? A 2026 Collector's Guide
Table of Contents
- What 1:64 Scale Means for Diorama Quality
- How to Judge the Quality of a Pre-Made 1:64 Diorama
- 1:64 Scale Diorama Materials: What Holds Up Over Time
- Best 1:64 Diorama Accessories for Realistic Scenes
- How to Build a 1/64 Scale Diorama: Step-by-Step
- Repair and Restoration: Fixing Common Diorama Damage
- Cost-to-Quality Ratio: What You Get at Each Price Point
- Conclusion
- Frequently Asked Questions
Last Updated: September 14, 2026
What 1:64 Scale Means for Diorama Quality
1:64 scale dioramas are miniature display environments built to one-sixty-fourth the size of real objects, and they are good quality when the manufacturer respects true scale accuracy, uses durable materials, and controls defects before shipping. At this size, a standard diecast car measures roughly 7 to 8 centimeters long, so every accessory must shrink by the same factor. YCID Diecast and Dioramas builds and sells display environments in 1:18, 1:24, and 1:64 scales, and the smaller the scale, the less room there is to hide a mistake.
A 1:64 scale diorama lives or dies on precision: a fence post two millimeters too thick reads as a chunky toy rather than a miniature scene.

How Scale Accuracy Affects the Look of Your Display
Scale accuracy is the single biggest driver of whether a 1:64 scale diorama looks convincing or looks like a toy. When a parking garage, gas pump, or fence is built to true 1:64 proportions, a model car sits naturally; when proportions drift, the eye catches it instantly.
Three checks separate accurate scenes from sloppy ones:
- Door heights and lane widths that match real-world dimensions divided by 64
- Figures, signage, and debris sized consistently with the vehicles
- Texture that reads correctly at arm's length, not just in photos
How to Judge the Quality of a Pre-Made 1:64 Diorama
Judging quality comes down to inspecting four things before you buy: material, finish, assembly, and scale consistency. A pre-made 1:64 scale diorama is worth its price when all four hold up under a bright light and a close look. Start with a phone flashlight raked across the surface: it reveals paint flaws, mold lines, and uneven texture that normal room lighting hides. Do this before you buy, and again when a shipped scene arrives.
The Five-Minute Inspection Routine
Run these checks in order.
- Lift and twist the base. Hold one corner and let the scene hang. A quality base stays flat. If it twists or the opposite corner lifts, the base is too thin or warped.
- Rake a light across every surface. Look for paint runs, dust trapped in resin, and uneven texture. Flaws that vanish in soft light reappear under a raking beam.
- Check every seam and joint. Walls should meet square, with no visible glue squeeze-out; shiny patches mean over-gluing, a cosmetic and structural warning sign.
- Test the small parts. Gently press a fence post or sign. It should feel anchored, not springy, loose accessories are the most common shipping complaint.
- Compare proportions to the vehicle. Set a 1:64 car in the scene. Doorways, lane widths, and figure heights should look natural. Oversized figures or chunky fences are the clearest scale-accuracy tell.
A Defect Taxonomy: What Each Flaw Tells You
Where a flaw appears tells you how the scene was made and how it will age.
| Defect | Likely Cause | Severity |
|---|---|---|
| Mold lines on visible surfaces | Rushed finishing | Cosmetic |
| Dust or bubbles in resin | Poor casting environment | Cosmetic to structural |
| Glue squeeze-out at joints | Assembly haste | Cosmetic, hints at weak bond |
| Warped base or walls | Thin material or heat exposure | Structural |
| Loose accessories | Insufficient bonding or poor packing | Structural |
| Oversized figures or fences | Wrong scale reference | Accuracy |
Cosmetic flaws affect looks; structural flaws affect longevity. One structural flaw outweighs several cosmetic ones, because it predicts future failure.
An Objective Quality Grading System for Collectors
Most guides say "trust your eye." That is not a system. Here is a five-point grading rubric for any pre-made scene:
| Criterion | What to Check | Red Flag |
|---|---|---|
| Scale accuracy | Proportions match 1:64 | Oversized figures or fences |
| Surface finish | Even paint, clean texture | Runs, dust in the resin |
| Assembly | Straight joints, tight seams | Gaps, glue residue, leaning walls |
| Material | Rigid, no warping | Thin plastic that flexes |
| Packaging | Foam support, no loose parts | Rattling box, no padding |
Score each item from one to five; anything averaging below three is a pass, regardless of how good the product photos look. Packaging matters more than most buyers realize, a scene packed loosely will not survive a move.
Material Durability Analysis: Resin, Plastic, and Wood
Resin holds detail best and resists warping, but it is brittle and chips if dropped. Plastic is affordable and forgiving, yet thin walls flex and bow over time. Wood gives the warmest scenery texture but expands and contracts with humidity, cracking paint finish.
For a shelf display that rarely moves, resin is strongest. For a scene you rearrange often, plastic survives handling better. In mixed-material scenes, watch the joints, that is where movement causes the first cracks.
1:64 Scale Diorama Materials: What Holds Up Over Time
Durability over years depends less on the material label than on three variables: response to humidity and temperature swings, bonding, and display. Two scenes made from the same resin can age very differently. Here is what actually fails, and why.
Resin: Best Detail, Brittle Under Impact
Resin (polyurethane and epoxy variants) captures the finest texture, brick mortar lines, asphalt aggregate, tiny signage, because it cures hard and holds mold detail. Its weakness is impact, not time. A resin fence post that survives a decade on a shelf can snap in one drop.
- Aging behavior: Dimensionally stable in normal indoor conditions; resists warping and sagging.
- Common failure: Chipping at thin edges, hairline cracks at glued joints, and yellowing if the resin was not UV-stabilized and sits in direct sun.
- Inspection check: Flex a thin edge gently. Quality resin feels rigid and gives a sharp tap sound; under-cured resin feels slightly waxy and dulls the tap.
Plastic: Forgiving, But Prone to Flex and Creep
Polystyrene and ABS are the workhorses of budget and mid-range scenes, tolerating handling and easy to glue and repaint. The trade-off: thin plastic walls bow over time under their own weight or constant heat, a slow deformation engineers call creep.
- Aging behavior: Stable if thick and well-supported; thin unsupported spans sag.
- Common failure: Warped walls, popped glue seams, and stress whitening (a cloudy white line) where the part was bent.
- Inspection check: Look for a base that stays flat when you lift one corner. If the whole scene twists, the plastic is too thin for the span.
Wood: Warm Texture, Moves With the Room
Wood gives the most natural scenery texture, planks, crates, weathered siding, but it is hygroscopic, absorbing and releasing moisture as indoor humidity changes. That movement cracks paint and opens seams.
- Aging behavior: Expands in humid summer air and contracts in dry winter air; a sealed finish slows but does not stop this.
- Common failure: Paint cracking along grain lines, seams opening at wood-to-resin joints, and slight warping of thin panels.
- Inspection check: Run a fingernail along a painted wood edge. A finish that flakes easily was applied over unsealed wood.
Mixed-Media Scenes: Where Joints Fail First
Most quality 1:64 scenes combine materials, a resin building on a wood base with plastic accessories. In mixed-media builds, the joint between materials that expand at different rates fails first: a resin wall glued rigidly to a wood floor will eventually crack the paint along that seam as the wood moves.
Quality makers use flexible adhesives at material transitions and seal each material before assembly. When inspecting a scene, look at the seams where different materials meet, that is where craftsmanship shows.
The Storage Variables That Decide Longevity
Material choice sets the ceiling on durability, but storage decides whether you reach it. Three conditions do the most damage:
- Heat: Attics and garages routinely swing far beyond normal indoor temperatures. Heat softens adhesives and accelerates plastic creep.
- Humidity: Basements and garages drive wood movement and can corrode metal details. Normal conditioned indoor air is the safe zone.
- UV light: Direct sun yellows resin, fades printed textures, and dries out wood finishes. A shelf out of direct sun extends life significantly.
A practical rule: if you would not store a photograph there, do not store a diorama there.
Keep the original foam packaging. It is the cheapest insurance you own, it protects the scene during moves and makes resale or shipping far safer.
A Quick Durability Scorecard
When comparing two scenes at the same price, score each on these five points:
| Factor | What Good Looks Like | Why It Matters |
|---|---|---|
| Base rigidity | Flat, no twist when lifted | Prevents warping and seam cracks |
| Joint flexibility | Slight give at material transitions | Absorbs expansion and contraction |
| Finish sealing | Even matte coat, no bare edges | Blocks moisture and dust |
| Material thickness | No flex in walls or posts | Resists creep and impact damage |
| UV stability | No yellowing in indirect light | Preserves color over years |
A scene that scores well here will outlast a prettier one that does not, whatever material it is made from.
Best 1:64 Diorama Accessories for Realistic Scenes
The accessories make or break realism, and the essentials are consistent across the hobby: asphalt and concrete textures, fencing, tarps, debris, signage, figures, and lighting. A great base with no small details still reads as empty.
For collectors who want a finished look without building from scratch, YCID Diecast and Dioramas offers pre-built environments such as the 1/64 Crankys Speed Shop at $22.95, a showroom scene with a printed parts wall and a sliding front panel so you can add your own tires, parts, and figures. It is a practical example of how a single well-made piece anchors a whole shelf display.
How to Build a 1/64 Scale Diorama: Step-by-Step
Building your own scene is more approachable than most beginners expect. The process rewards patience over skill, and a first attempt can look convincing in a single weekend.
Total Time: 4-8 hours across two sessions Difficulty: Beginner to intermediate
What You'll Need:
- A rigid base board or pre-cut diorama base
- Asphalt or concrete texture sheet, or textured paint
- Fencing, signage, and small scenery pieces
- Model figures and a 1:64 model car
- Craft knife, tweezers, and fine-tip glue
- Plan the layout. Sketch the footprint and mark where the car, building, and figures will sit.
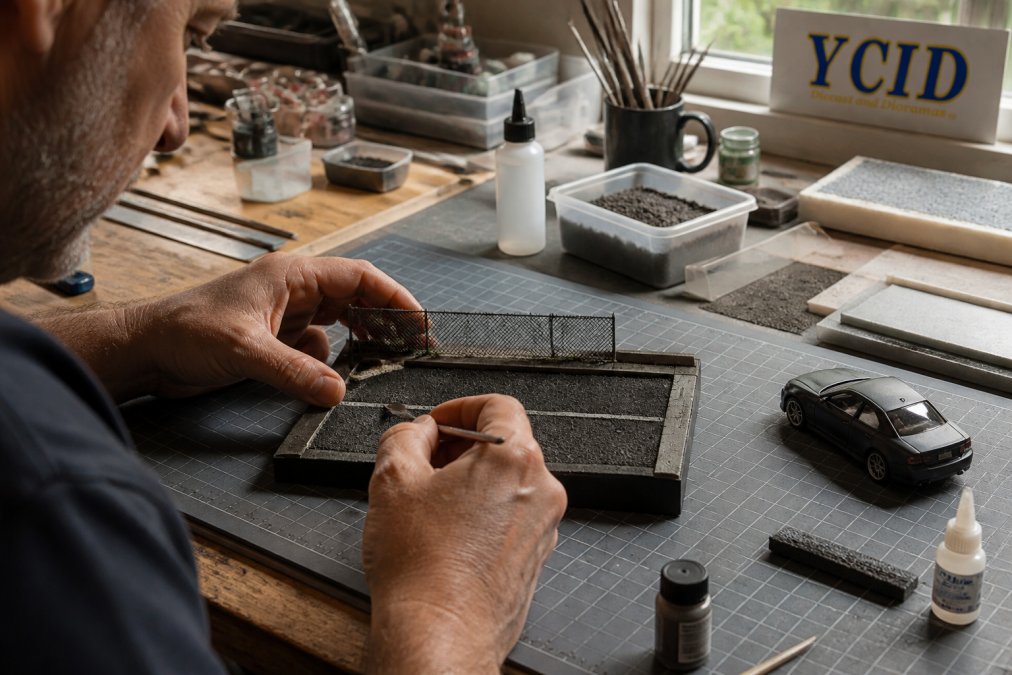
- Prepare the base. Cut the base to size and seal the edges so texture does not flake.
- Apply the ground texture. Lay asphalt or concrete texture and let it cure fully before adding anything on top.
- Add structures. Glue walls, fences, and signage, checking that each is square to the base.
- Detail the scene. Place debris, tarps, and small props to break up empty space.
- Position vehicles and figures. Set them without gluing first, then fix once the composition works.
- Weather and seal. Add light weathering and a matte seal to protect the finish.
Expected Result: A shelf-ready 1:64 scene that holds up to close inspection.
Repair and Restoration: Fixing Common Diorama Damage
Most diorama damage is fixable, and shipping damage is the most common culprit. Loose fences, snapped posts, and chipped paint finish can usually be repaired in under an hour with basic tools.
The repair sequence:
- Photograph the damage before touching anything, for any claim
- Reattach loose parts with material-appropriate adhesive
- Touch up chips with matched acrylic paint
- Re-seal the repaired area to blend it with the rest
A common mistake is over-gluing. Excess adhesive creates shiny patches that stand out worse than the original break.
Cost-to-Quality Ratio: What You Get at Each Price Point
Spending more does not automatically buy better quality, but it does buy better materials and tighter quality control. The trick is knowing where the money goes.
| Price Tier | Typical Materials | Quality Control | Best For |
|---|---|---|---|
| Budget | Thin plastic, printed texture | Minimal inspection | First experiments |
| Mid-range | Resin accents, detailed texture | Spot-checked | Most collectors |
| Premium | Full resin, hand-detailed | Individually inspected | Display centerpieces |
The mid-range is where most collectors get the best value: resin detail and real inspection without paying for hand-finishing you may not notice.
Conclusion
The honest answer to whether 1:64 scale dioramas are good quality is that it depends entirely on the maker, not the scale. A scene built to true proportions with rigid materials and real quality control will look convincing for years; a cheap one will chip and warp within months. At YCID Diecast and Dioramas, we build display environments in 1:18, 1:24, and 1:64 scales with the same attention to scale accuracy and finish, and we back in-stock orders over $300.00 with free US shipping. Browse the collection and find a scene that does justice to your models.
Frequently Asked Questions
Are plastic or resin 1:64 scale dioramas better for display?
Resin captures finer detail like brick texture and asphalt grain, but it chips if dropped. Plastic is lighter and more affordable, though molded details can look softer. For a shelf display that rarely moves, resin gives better realism. For a diorama that gets handled or rearranged often, plastic holds up better. Many collectors use resin for the base and plastic for accessories like figures and fences.
How do I check a pre-made 1:64 diorama for quality before buying?
Ask for close-up photos of corners, seams, and painted surfaces. Look for bubbles in resin, uneven asphalt texture, or misaligned fences. Check that the scale matches 1:64 model cars, roughly 2.5 to 3 inches long. A good seller will show real photos, not just renders, and will explain what materials were used. If the listing avoids those details, treat it as a warning sign.
What is the best material for a 1:64 scale diorama base?
MDF or plywood works well for the structural base because it stays flat and resists warping. For the surface texture, resin or sculpted foam gives the most realistic asphalt and concrete. Avoid cardboard alone, since it absorbs moisture and curls over time. If you want a parking garage or speed shop scene, a wood base with a resin or foam top layer balances durability and detail.
Can I build a 1/64 scale diorama without prior experience?
Yes. Start with a pre-made base and add accessories like figures, fences, and tarps. A kit like the 1/64 Crankys Speed Shop at $22.95 gives you a printed back wall and a sliding front panel, so you can add parts and tires without building from scratch. Most beginners finish a simple scene in a weekend using pre-textured materials and hobby glue.